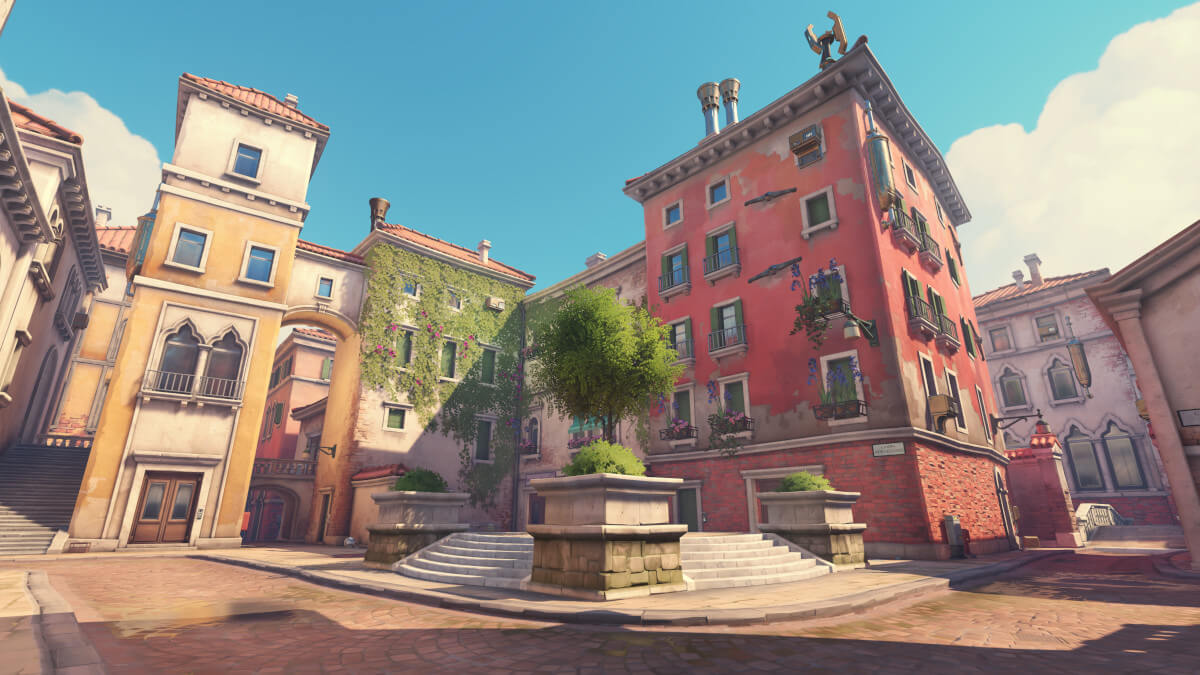
Map Overview
Rialto transports teams to the canals and piazzas of Venice, Italy, where the payload moves through a waterfront district, across a famous arched bridge, and along the final canal section.
The map is visually stunning and features beautiful architecture that creates multiple vertical play opportunities.
The three phases include the initial waterfront piazza, a bridge crossing with excellent sniper positions, and a final canal delivery point.
Rialto is notable for the environmental hazard of the water canal, which runs alongside much of the route and can be used to create lethal positioning threats.
Attack Strategy
Begin by clearing the restaurant balcony on the right side before moving the payload — this position controls the entire first section.
Push with Sigma's barrier while your damage heroes fire from the left market path.
At the bridge, do not approach from the front — use the gondola dock on the left to attack the bridge defenders from a flanking angle.
The canal section rewards teams who hold the far left covered walkway, which runs parallel to the main canal road.
Make a decisive push with ultimates at the final arched gateway before time expires.
Defense Strategy
Defenders should immediately establish a sniper on the restaurant balcony to control the first section completely.
At the bridge, hold from the far side of the arch rather than on the bridge itself — this gives better angles and retreat options.
In the canal section, split defenders between the left covered walkway and the main road to prevent easy flanking.
Bastion turret mode positioned behind the final arch is one of the strongest single positions in the game.
Save all defensive ultimates for the final canal push.
Key Positions & High Ground
Restaurant Balcony: The right-side elevated terrace at the start controls the entire first section with wide sightlines over the piazza.
Bridge Arch Top: The highest point of the bridge can be accessed and provides a dominant position over both the bridge crossing and the canal approach.
Gondola Dock: A lower-level flanking path that bypasses the bridge defence and allows attackers to pressure from the side.
Canal Covered Walkway: Running along the left side of the final section, this sheltered path provides advance flanking opportunities.
Chokepoints to Control
The bridge crossing is the map's iconic chokepoint — crossing a narrow arch with defenders on both sides is extremely dangerous.
Use the gondola dock flanking route to distract defenders while the barrier pushes over the top.
The final arched gateway before the delivery point is the most dangerous choke — defenders inside can fire out while being protected.
A coordinated Earthshatter through the gateway clears this position reliably.
Ultimate Usage Tips
Earthshatter at the bridge approach followed by Nano Boost surge is a nearly unstoppable combination.
Gravitic Flux over the bridge picks up all defenders crossing or standing on the arch.
On defence, Graviton Surge at the gondola dock area catches flankers attempting the bypass route.
Self-Destruct at the final arch gateway paired with any AOE ultimate guarantees clearing the defence.
Common Mistakes to Avoid
Attackers walk directly over the bridge without clearing the balcony snipers, losing the first player immediately every push.
Always establish the restaurant balcony before moving the payload.
Teams ignore the gondola dock flanking path entirely, repeatedly walking into the bridge chokepoint instead of bypassing it.
Defenders break formation and walk onto the bridge instead of holding the far side, losing positional advantage.
Ready to master Rialto?
Check out our curated hero recommendations to complete your preparation for Rialto.
View Best Heroes