Map Overview
Dorado is a picturesque Mexican coastal town where attackers must escort the payload through winding streets, a bridge, and a hacienda to reach the final delivery point.
The map is notable for its verticality — attackers can reach rooftops and balconies throughout the route, while defenders have elevated positions to challenge from.
The payload travels through three distinct zones: the initial town section with its market and fountain, the bridge and hacienda mid-section, and the final stretch through the waterfront.
This is one of the most played escort maps in competitive and rewards teams that master the elevated positions.
Attack Strategy
Attackers should immediately contest the rooftop above the fountain to prevent snipers from locking down the initial push.
Use Sigma's barrier to push through the market while your damage heroes clear the elevated walkways.
When approaching the bridge, send a flanker through the lower tunnel to pressure defenders from behind.
The hacienda section rewards aggressive play — push through the central hall rather than hesitating in the doorway.
On the final section, use the beach path on the right to outflank defenders who stack on the main road.
Defense Strategy
Defenders should set up Widowmaker or Ashe on the left balcony overlooking the fountain to immediately apply pressure.
Your tank should hold at the first arch rather than walking out to meet attackers in the open.
After ceding the first checkpoint, rotate through the upper hacienda level to maintain high ground advantage.
For the final section, split your defence between the main road and the right beach path to prevent flanking.
Bastion in the hacienda doorway with a shield is one of the strongest defensive setups on the map.
Key Positions & High Ground
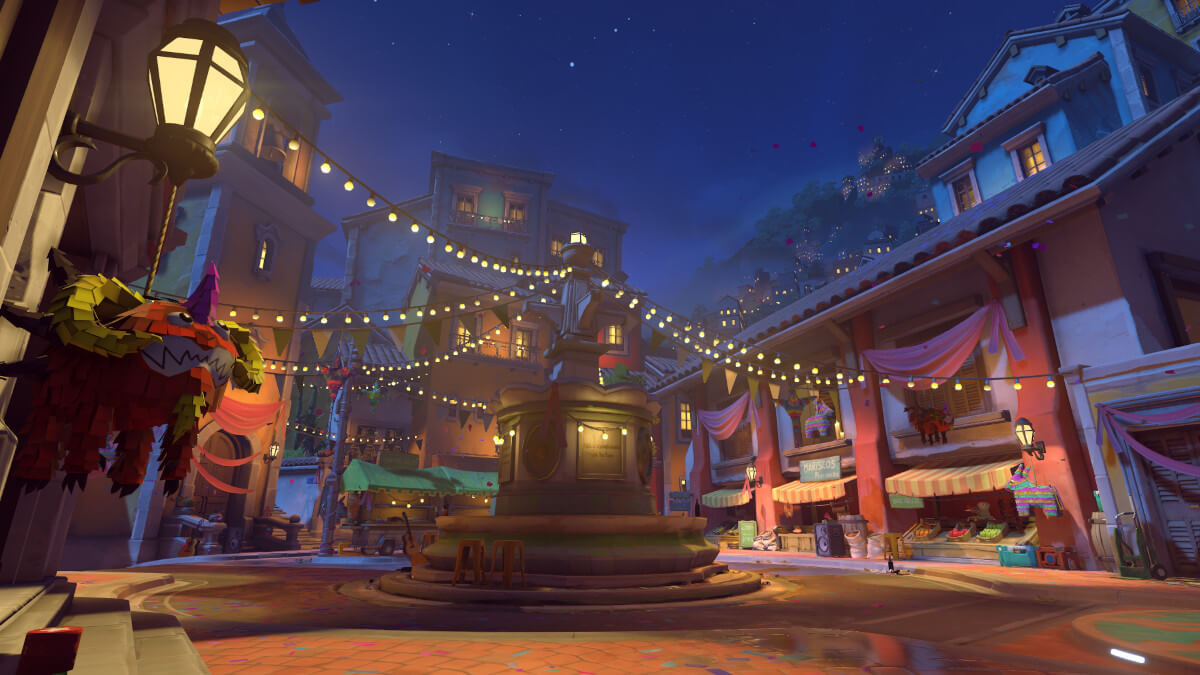
Fountain Rooftop: Accessed from the left side of the fountain area, this position overlooks the entire first section and is critical for both attack and defence.
Bridge High Ground: The elevated walkway running parallel to the bridge gives snipers unobstructed sightlines over the mid-section.
Hacienda Balcony: Overlooking the payload in the hacienda zone, this position lets defenders fire down on attackers pushing through.
Beach Flank: The lower right path behind the hacienda allows attackers to bypass the main chokepoints and surprise defenders.
Chokepoints to Control
The bridge choke is the most critical point on Dorado — defenders stack on the left wall and deny progress effectively.
Use the lower passage under the bridge to send flankers through, drawing out defensive abilities before the main team pushes through.
The hacienda doorway creates another major chokepoint where Bastion and Torbjorn defenders excel.
Break this with a Dragonblade, Death Blossom, or Earthshatter before committing the team.
The final arch before the delivery point is defended by teams who stack on the high ground — target the high ground with long-range pressure before pushing.
Ultimate Usage Tips
Nano Boost on an Earthshatter through the bridge chokepoint can instantly clear the entire defensive setup and push the payload safely across.
Dragonstrike or Gravitic Flux on the hacienda doorway group wipes defenders before the main team pushes in.
On defence, a well-placed Blizzard or Earthshatter at the bridge approach stops momentum cold.
Kitsune Rush is extremely powerful for the final section push when time is low.
Common Mistakes to Avoid
Teams frequently stall at the bridge without using the lower tunnel passage, taking repeated losses against the same elevated position.
Always have a flanker apply pressure through the tunnel while the main team pushes the bridge.
Defenders often abandon the hacienda balcony too quickly — this position should be held as long as possible to drain attacker time.
Attackers waste time in the hacienda doorway without using utilities to break through — always have an escape route through the side rooms.
Ready to master Dorado?
Check out our curated hero recommendations to complete your preparation for Dorado.
View Best Heroes